Skip to content

Amazon Cognito Hosted UI Tutorial – Full Example

Amazon Cognito Hosted UI screen

Amazon Cognito makes it easy to add user signup and login to your web and mobile apps by abstracting out all of the functionality necessary including authentication and storage of credentials. By leveraging AWS Cognito, we can take advantage of built in security features such as multi factor authentication and password encryption/storage.

Features/Functionality of Amazon Cognito include: 

  • User sign-up / registration
  • Login / authentication
  • Account verification email
  • Reset password through Forgot password link
  • Login through Facebook, Google, and Amazon
  • Enterprise identity federation through SAML

There are 2 main ways for implementing an authentication flow in your application using Amazon Cognito:

1. Custom UI: With this option, you create your own signup/login flow and then hook it up with Amazon Cogito by using the AWS Amplify framework (recommended method for Custom UI), or through the API or SDK.

2. Amazon Cognito Hosted UI: This is by far the easiest flow for implementing  a signup/login process with Amazon Cognito. You configure a few settings/options and the forms are generated and hosted for you by AWS. Just attach your custom domain to it and direct your users there to authenticate before directing them back to your application. 

The main downside of the hosted UI method is that since the flow is created for you, styling and customization is more limited. 


In this tutorial, we will setup and integrate an authentication flow with Amazon Cognito using the hosted UI and we’ll cover the Custom UI flow in a subsequent post. 

Create a User Pool in AWS Cognito

Cognito Dashboard Screenshot

From your AWS console, navigate to Cognito and click on Mange User Pools.

Give your user pool a name then click on Step through settings.


Form Attributes

This is where you can configure which information fields you want to require from your users. Note that these cannot be changed once your pool has been created. 

Password Policies

MFA and verification

Amazon Cognito will send account-related emails/texts to your users, for example to ask a user to confirm their email address or help a user to reset their password. In order to send these texts/emails, you will have to create an IAM role giving Amazon Cognito the correct permissions to send these on your behalf.

Next configure the email address that you want the account emails to come from. If you use the built-in default option, you can simply enter the email addresses. However, if you anticipate having a high volume of emails that will need to be sent, you will need to setup SES and configure that first. For demo purposes we will use the default option.


customize message

You can customize the content of the emails that your users will receive. 

App Clients

Next you will need to create an app client which you will use in your application. Settings will vary based on how you plan to integrate the authentication flow. For the purposes of this demo, since we will be authenticating on the server side we need to check the Generate client secret option.

Once you are done with this step, move on to the review step, check all your settings and finalize your user pool creation. 

Amazon Cognito Domain

You can choose a domain prefix and Cognito will provide a unique endpoint where the sign in and sign out pages live. Optionally, you can add a custom domain so that your login screens live on a subdomain of your website’s main domain, for example auth.yourdomain.com. 

App Integration

App Client Settings

App Client Settings

The callback is where you want your users to be redirected once they have successfully authenticated, i.e the part of your website that requires users to be logged in. The sign out url is where users will be taken once they sign out. 

The OAuth 2 settings will vary based on how you integrate this flow into your application. For the demo app, we will use the authorization code grant.

Preview Hosted UI Screens

At this point, you will have fully functional sign in and sign out screens. You can preview them by clicking on “Launch Hosted UI” near the bottom of the App Client page (as pictured in the previous screenshot). This will load up the 

This will take you to the url of your hosted UI screens, with the correct query string parameters such as client id, response type, scope etc. When integrating these screens into your application, simply construct a url of this format to direct a user to sign in. 

Amazon cognito login screen sample

Customize Login Screens

You can customize these prebuilt sign in pages by uploading a logo, changing text labels and colors. 

Customize cognito screens

Integrating Amazon Cognito UI screens into your App

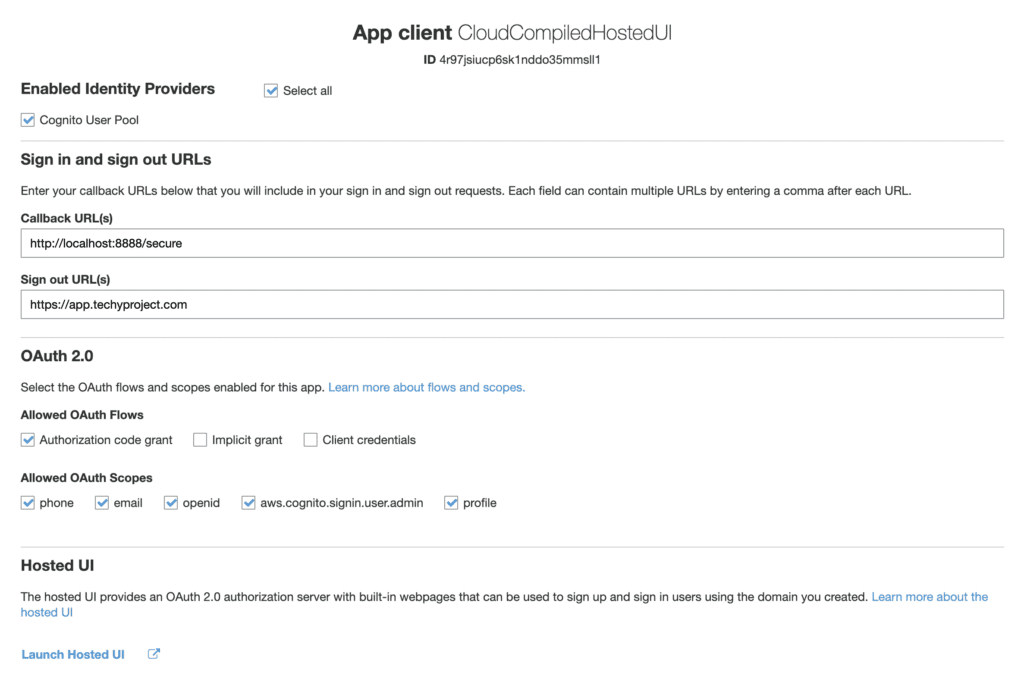
Once your screens are customized and ready to be used all that’s left is to link to them from your application. From your application, when a user clicks sign in, simply direct them to the Cognito login screen by constructing a url of the following format: 

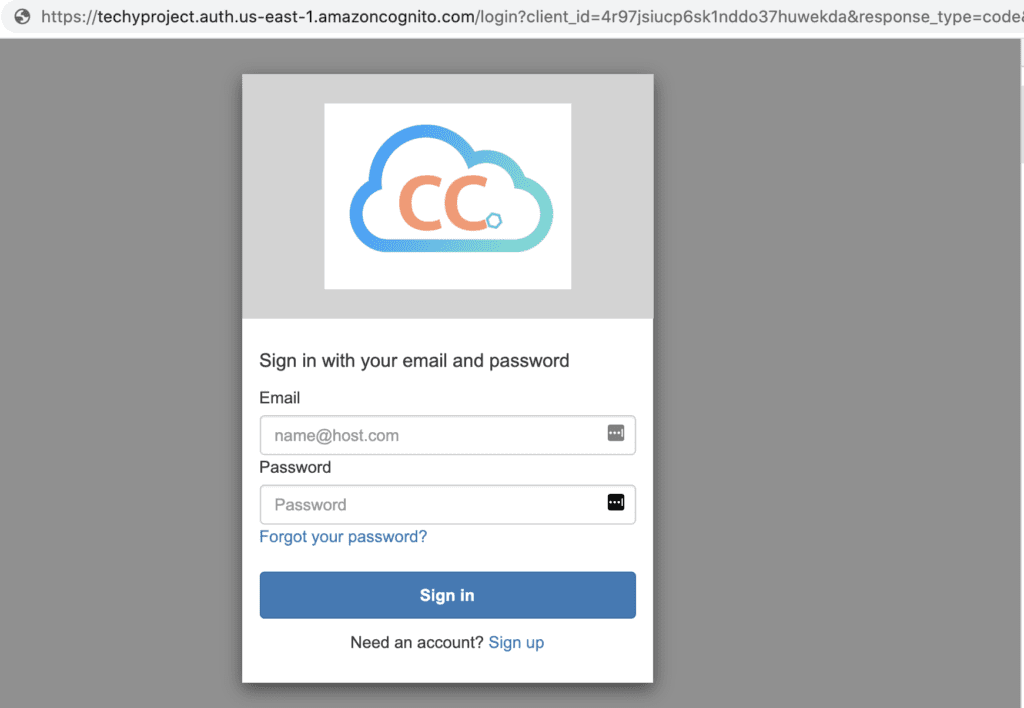
https://your-domain-prefix.auth.us-east-1.amazoncognito.com/login?client_id=CLIENT_ID&response_type=TYPE&scope=SCOPE&redirect_uri=URI

For example: 
https://auth.techyproject.com/login?client_id=4r97jsiucp6sk1nddo37huydf1&response_type=code&scope=aws.cognito.signin.user.admin+email+openid+phone+profile&redirect_uri=http://localhost:8888/secure

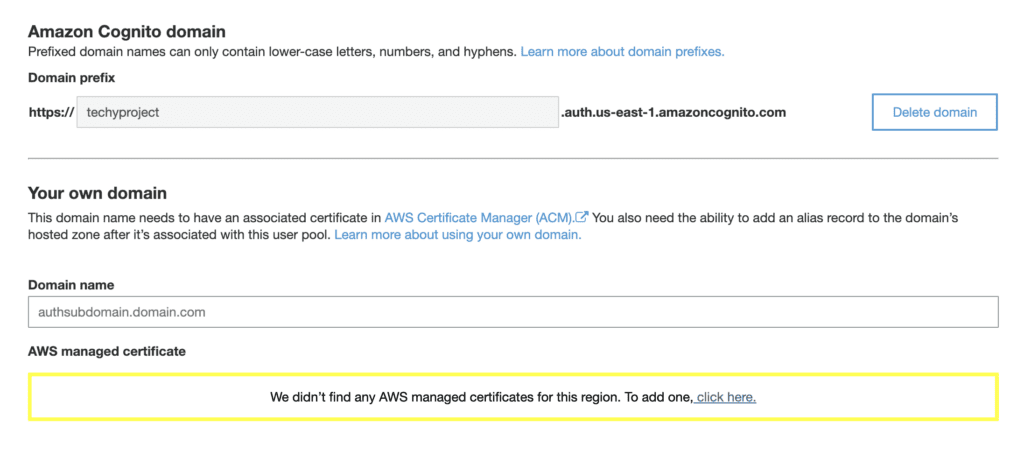
(Note, my redirect_uri is set to localhost for testing but you should set yours to the part of your application that requires users to be logged in. Also note that in this case a custom domain is being used instead of the domain prefix endpoint provided by Cognito) 

See here for a description of each query string parameter as well as examples of all valid parameter options.

Once the user is authenticated, Cognito will redirect the user to our app, passing along an authorization code. We can use this code to generate an access token. This token will allow us to make API calls to Cognito and verify that the user is allowed to access the app, as well as to pull user attributes.  This flow follows standard OAuth2 patterns. If you would like your app to allow users to remain signed in for a period of time, you may need to store the refresh token which you would use to periodically generate new access tokens. You will need new access tokens to make additional API calls to Cognito as access tokens expire within a set timeframe depending on your settings.

Found this interesting? Share it!
Tags:

Leave a Reply

Your email address will not be published.