Amazon Lightsail is a service within AWS that lets you provision virtual private servers quickly and easily. Using Lightsail, you can launch websites and applications within minutes in just a few clicks. In this tutorial we will be setting up a fully functional WordPress website on a Lightsail instance.
Advantages of Amazon Lightsail
- Quick & Easy setup – launch a live site within minutes
- Basic security & permissions pre-configured for convenience. When using EC2, you are responsible for setting up your VPC, security rules, and IAM roles for permissions. With Amazon Lightsail, most of this is abstracted away from the user and preconfigured for you so that you can get up and running quickly.
- Straightforward, predictable pricing. It can often be difficult to figure out up front how much your AWS services will cost you until after you’ve used it. With Amazon Lightsail, it’s a simple monthly fee that makes it really easy to estimate how much you will be spending.
- Simple intuitive interface. The AWS Console has hundreds of services which can be overwhelming if you’re just getting started. Lightsail has its own simplified dashboard that is outside of the main console to make it easy to focus only on what you need.
When to use EC2 over Amazon Lightsail
If your project requires granular customization and control, EC2 may be better suited. For example, if you already have other resources in AWS and you are looking to integrate multiple other AWS services together, it may be better to use EC2. If you need a more specialized type of server, EC2 also has a much wider range of types to choose from. Finally if you are anticipating extremely high volumes of traffic, the load balancers within AWS may be better suited than the simplified version available within Lightsail.
How much is Amazon Lightsail Pricing?
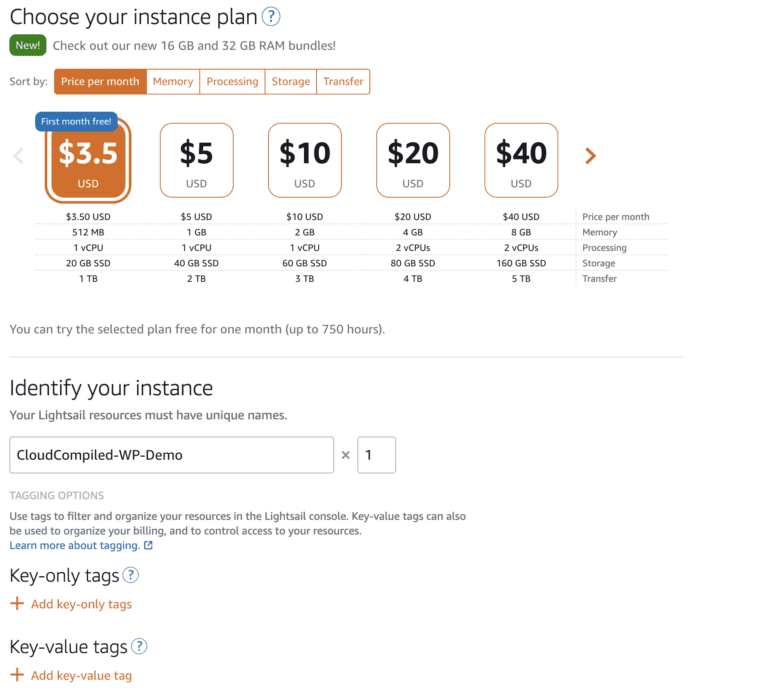
The Lightsail server instances range in price from $3.50 – $160. In addition, Lightsail offers managed databases, containers, a load balancer, block storage and a CDN (Content delivery network). See here for full pricing of all Lightsail products.
For most smaller starter websites, the $3.50 plan should be sufficient. If the site is anticipating a lot of traffic, or it is critical that there is absolutely no downtime, the add-on features such as managed databases and load balancer should be considered.
Setup WordPress Hosting on AWS using Amazon Lightsail
1. Create the instance
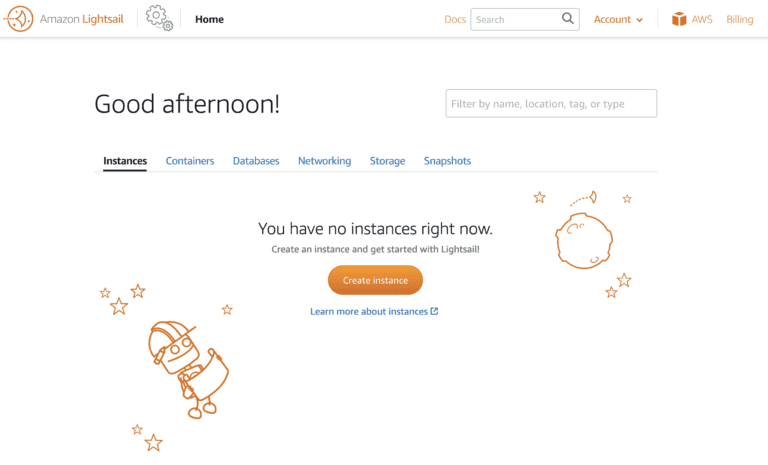
First, sign in to the AWS Console and search for Lightsail, or click here to go directly to the Lightsail dashboard. Click on Create Instance
2. Select WordPress instance type
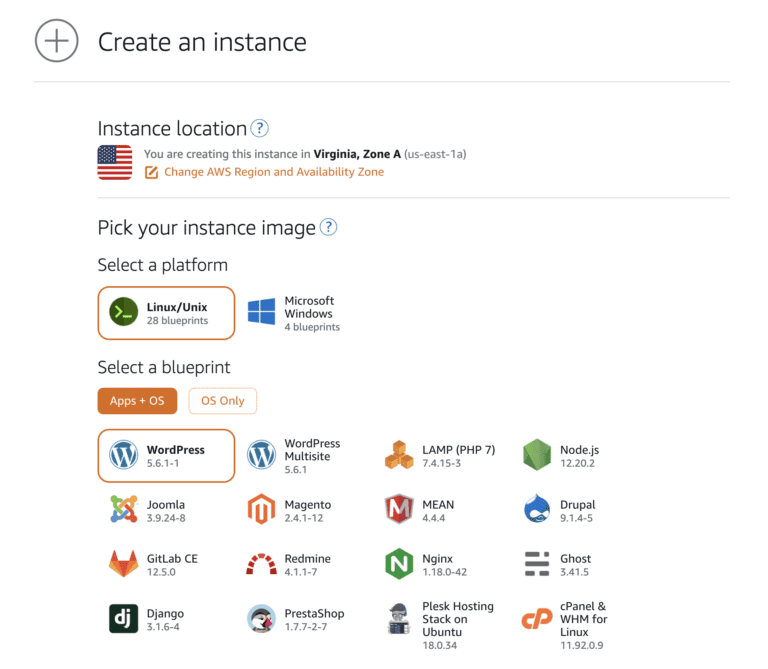
As can be seen from the screenshot, Lightsail offers a variety of applications and stack types to choose from. Select WordPress.
3. Configure options
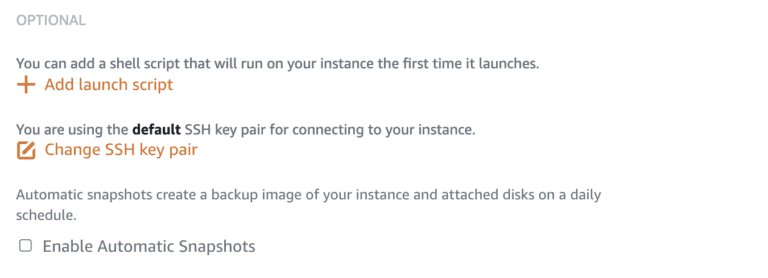
If desired, you can add a launch script. If there is some special setup or settings you would like your server to have, you can add those commands and they will automatically get run as soon as the instance is up.
By default an SSH key pair will automatically be created and used for you. If you would like to use a new key, click on Change SSH key and it will guide you through creating a new one. Be sure to download it as it is only available once and is required for shelling in to the server.
Lightsail Snapshots are like backups of your instance. In general it’s a good idea to have periodic snapshots so that you have a point to restore from in the rare event that there is a server issue. Snapshots can also be created manually from the dashboard.
4. Choose the Lightsail instance size
Choose your desired instance size and give your instance a unique name, then launch the instance.
5. Access your WordPress website
Once you launch your instance, within a couple of minutes the status should change from “Pending” to “Running”. Copy the public IP address and paste it in your browser to load up your WordPress site. An account will have been created for you and the WordPress database will be preinstalled. To login to the WordPress admin, we need to shell n to the server to retrieve the password.

6. SSH into the Lightsail WordPress instance
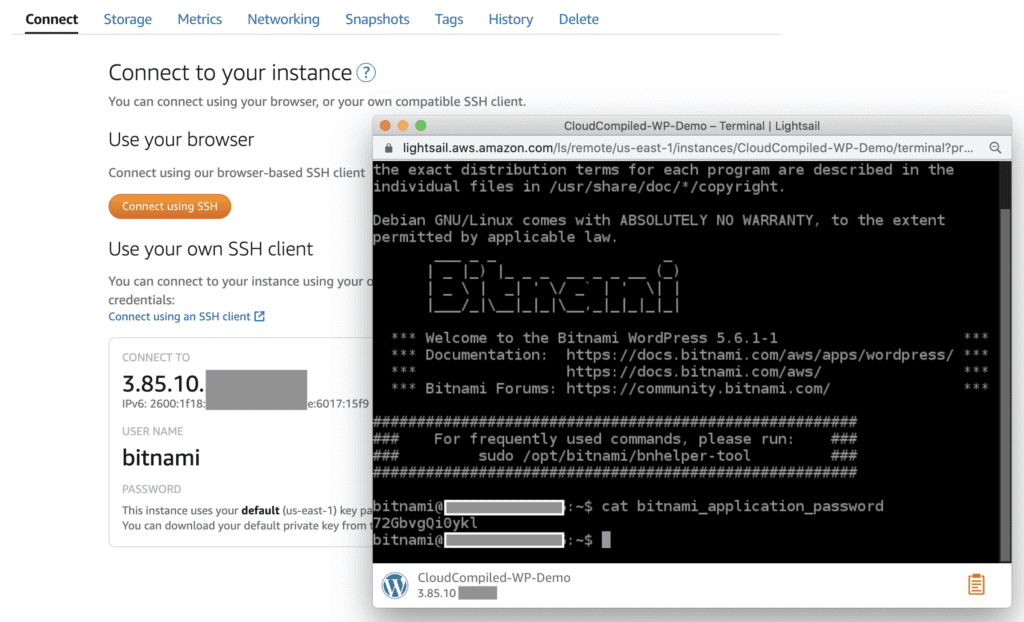
From the Lightsail dashboard, click on your instance then go to the Connect tab. Click on “Connect using SSH”. Alternately, if you created an SSH key during setup, you can use the terminal or an SSH client such as PuTTY to shell in instead. Run the following command to retrieve the WordPress password that was created for you:
cat bitnami_application_password
The string that appears will be your password.
7. Login to your WordPress website
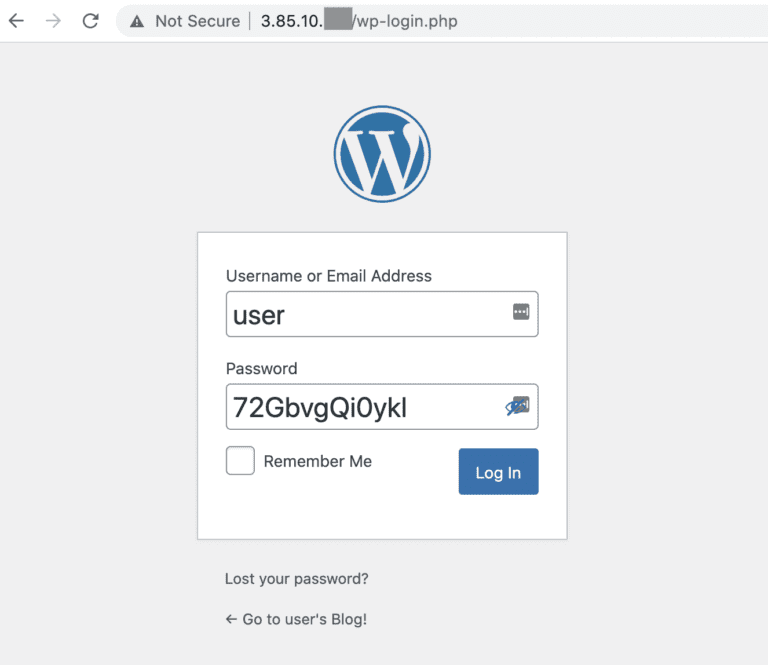
Go to your WordPress sign in page and login.
Login url: http://123.456.789/wp-login.php (where 123.456.789 is your instance’s public IP as highlighted in step 5)
username: user
password: XXXXX (The password you copied from the server in step 6)
8. Add a custom domain and SSL certificate to your Lightsail instance
Go to the DNS management area wherever you bought/manage your domain and add an A record pointing to your server’s public IP. For example:

Alternately, you could choose to manage your DNS within Lightsail instead. However you would first need to change your nameservers at your domain provider to transfer management to Lightsail. Learn more here.
Once you have added your DNS record, you should be able to type in your domain name in your browser to access your website. Note that depending on how your DNS is setup, it may take some time for changes to take effect.
If you’re able to access your site through your domain name, you’re ready to generate an SSL certificate. SSH into your instance as we did in step 6 and run the following command:
sudo /opt/bitnami/bncert-tool
You will be guided through a few questions. Simply follow the prompts and the certificate will be generated and configured for you. A cron job will also automatically be created to periodically renew the certificate to prevent it from expiring.
Removing the Bitnami logo banner from your Lightsail WordPresss website
When you load up your website, you may notice that there is a small banner in the bottom right hand corner of your homepage. To get rid of the banner, run the following command:
sudo /opt/bitnami/apps/wordpress/bnconfig --disable_banner 1 && sudo /opt/bitnami/ctlscript.sh restart apacheAt this point you should have a fully functional WordPress website hosted on AWS using Amazon Lightsail. While this tutorial specifically outlined how to setup a WordPress instance, the same principles apply for setting up any of the other types of applications available with Lightsail. For as low as $3.50/month, you can setup a site on your own instance within minutes! Whether you are just getting started with AWS or a seasoned cloud developer, Amazon Lightsail is a great solution for getting up and running with a project quickly.